
Last week, I did a post on how I dressed up some rather plain saddle pads. Since then, I haven't had much time to sew, but I finally got a few hours this morning to finish up the pad I made from scratch.

The finished product.
There are a couple of sites out there on how to make pads, but most of them are baby pads that use thin store-bought quilting as the backing. That's great if you want to make cute baby pads - it's pretty quick and easy. However, I was looking for something more sturdy, and fancier. Plus - not gonna lie - I have boxes and boxes of fabric that either need to be sewn up or given away. Might as well sew it up!
For my backing, I decided to use some felted wool I had leftover from a cloak-making project years ago. If you use a wool half-pad, you know how cool wool keeps the horse's back - much more so than most of the foam-filled saddle pads that are on the market today. The felted wool I have is quite thick, but I opted to do two layers of it for additional stability. For the facing layer, I used some very nice brocade I had laying around.

To start, I laid out a dressage pad I like onto my wool, and cut out 4 of those. Next, I laid the wool on the brocade and cut out 2 of those. Be careful to make sure you've got the pattern going the right way if you're using a pattered fabric, and make sure you do a left and a right piece.

Be sure to cut your top fabric a little larger than the bottom - everything will shrink up a bit when you quilt it together, so having extra is a good thing.

One you've got everything cut out, you're going to lay all three layers of one side together, brocade on top. Then, using pins every 3-4 inches, pin all three layers together. Use lots of pins! When you're finished, you should be able to pick up the entire stack of three layers and have them all move together.

For this next step, you need chalk and a ruler. This is a dressmaker's ruler, 2 inches wide. It's a convenient width to make your quilting.

With the chalk, mark diagonal lines every 2 inches all the way across the brocade.
Next, sew over all the lines, removing your pins as you go. When you're finished going one direction, do the same thing the other direction.

Here's what it looks like after you've quilted it together. Starting to look good!

After you've quilted both halves of your pad, trim off any excess fabric around the edges.

Next, put the brocade sides together. Using a wide zig-zag stitch, sew along the top of the pad, as close to the edge as you can get.

Here's what it will look like when you're done. This doesn't have to be perfect, as we're going to reinforce and cover this seam in the next few steps.

Cut a strip of your backing fabric about 2 inches wide and the length of the spine of your pad. Lay the strip on the right side of the seam you just sewed, then use a straight stitch to sew it down about 1/2 inch from the edge of the seam. Bonus if you get dog hair on your fabric.

After you've sewn down the first side, fold the loose edge of the fabric under about 1/2 inch...

Then fold it over the seam you just sewed. See how we covered that seam up?

Pin that sucker down...

And top-stitch it.

Here's what it will look like after you're done.

We did the bottom side first for a good reason... see how ugly the top seam looks, with the stitching on either side? We're going to cover this up in exactly the same way.

Cut a 2.5 inch wide strip of brocade the length of your pad, then sew it about 3/4 of an inch inside your seam.

Fold the loose edge over, then pin in place.

Here's what it looks like after you've topstitched it down.

And here's the back. Now all the ugly seams won't show on the top of our pad!
We're almost done! We just need to put on a binding, some trim, and the billet straps.
You can purchase bias tape from the fabric store to use as your binding. However, it only comes in cotton fabric, and the number of colors are limited. I also find it to be kinda pricey, lol, so I make my own. It's really, REALLY important to use bias-cut binding instead of ribbon or straight-cut binding. Here's why:

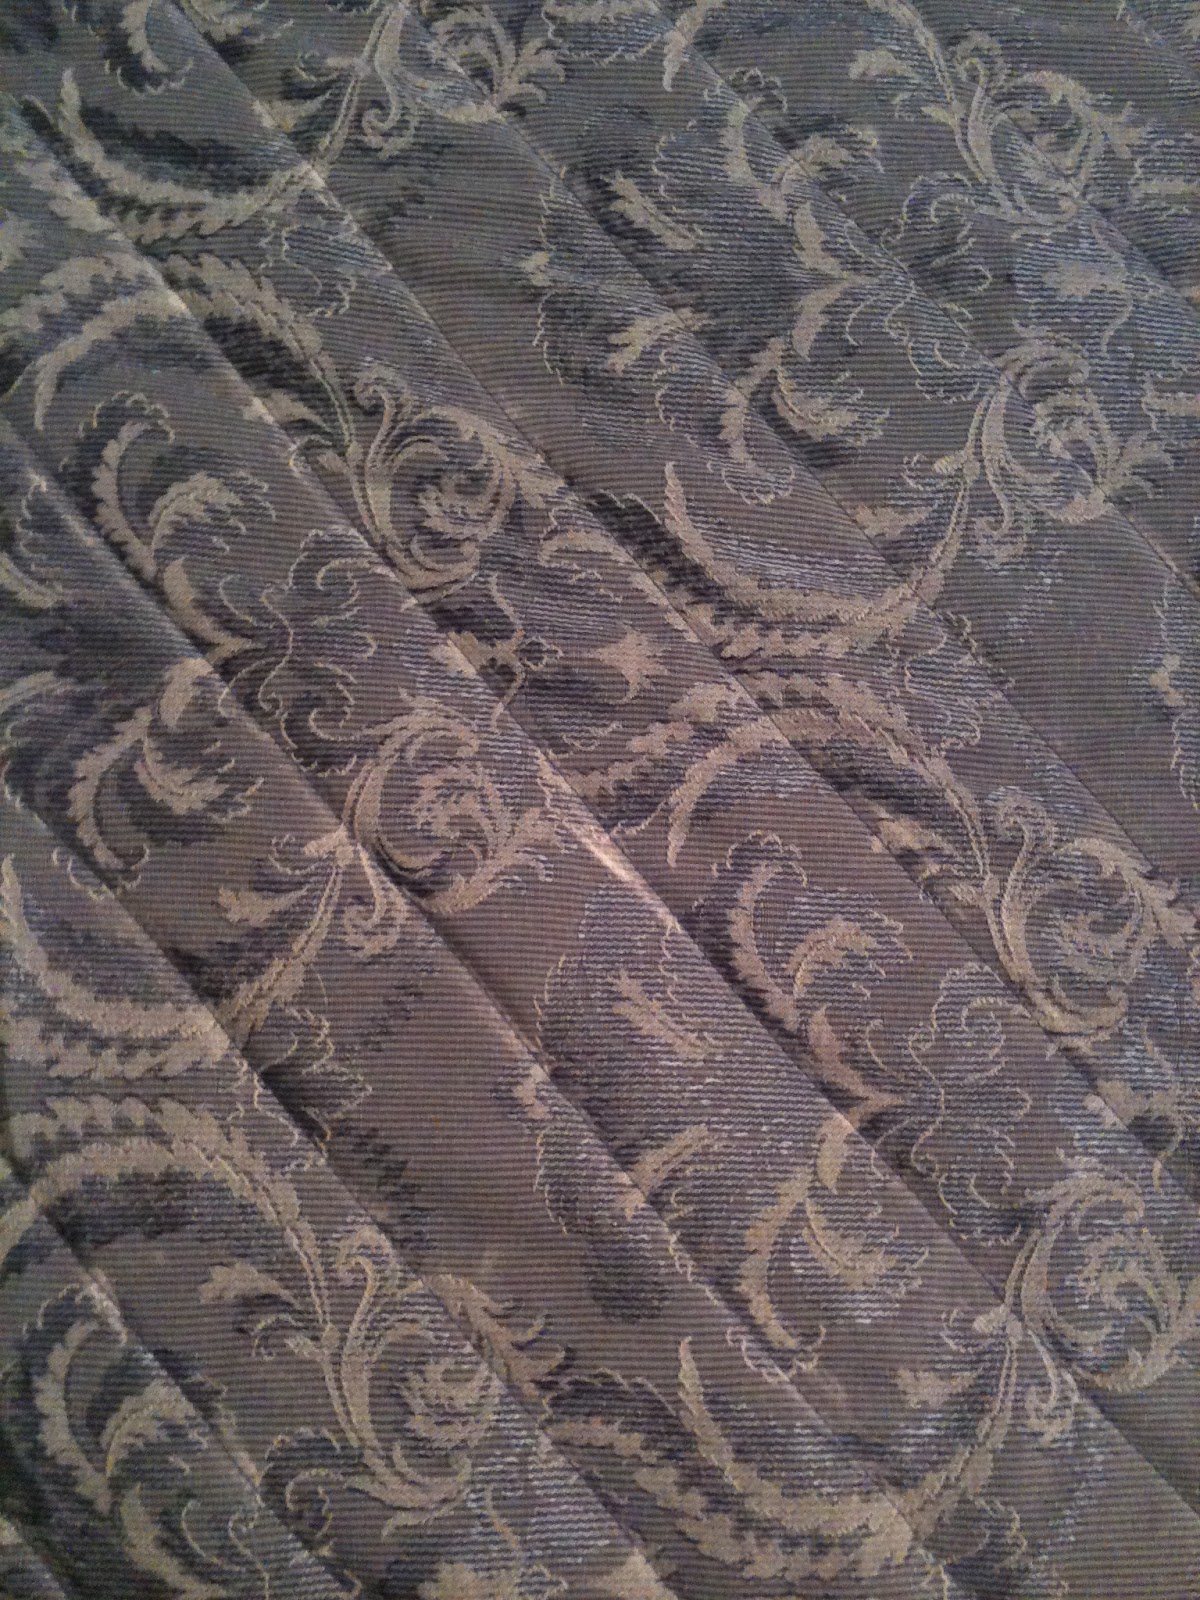
Fabric is woven in two directions - the warp and the woof. If you pull your fabric in either of those directions, it doesn't stretch. However, if you pull it across the diagonal (the bias), it stretches quite a bit! You can see that here with the the fabric I used - the diagonal ripples in the fabric show the bias. The stretch in bias tape allows you to go around the curves of the pad without wrinkling the binding.

I used this super-handy-dandy bias tape maker - and my trusty iron - to make my own bias tape in a matching color (again, extra fabric laying around).

When you're sewing your bias tape down, sew it to the bottom of your pad first.

Fold it over and around to the top of the pad, then pin it in place. You can see how easily it's curving around the pad, and there are no wrinkles.

All pinned down and just about to sew...

And volia! Looking good.

The second-to-last step... sewing down the trim. The trim is actually the only thing I had to buy at the fabric store, lol! I used silver metallic thread to match, and just zigzagged over it.

And last but not least, billet straps! Be sure to burn the ends of the webbing (to prevent fraying) before you sew it on.
Here's the finished product. I think it looks super classy, and the wool backing gives it a good weight and nice structure. I want to give it a test ride, but I'm also thinking I might save it as a show pad!
Pretty, pretty! Wish I had the patience to sew my own pad, I love how yours turned out. Maybe someday I'll have some time on my hands to do something fun like that.
ReplyDeleteThanks! I'm sure you would have the patience for this, it's just a matter of doing a little at a time until you're done!
DeleteOther than when you're out xc, when can you show with a coloured pad?
ReplyDeleteSchooling dressage show. Which I may or may not be planning to attend in a few weeks! :)
DeleteBeautiful! I'll have to try this one of these years, I'd love to have sets for each horse with their name on it so the pads won't get mixed up! (I have an embroidery machine, so that wouldn't be an issue :) )
ReplyDeleteOOOH! An embroider machine?!?! WANT! I was thinking how pretty it would be to do some celtic knotwork designs or vine patterns on a plainer pad - love the idea of putting a horse's name on it too! You'll have to do it and post pics!
DeleteVery cool! Please take it as a compliment when I say it looks store bought. Very tidy and professionally done. I'm way impressed.
ReplyDeleteSB, that's the nicest comment you could have given me! I definitely don't want someone to think that it's homemade. I prefer "custom", lol!
DeleteWow. You're a pro.
ReplyDeleteYears of sewing experience definitely helped me on this project!
DeleteAh-may-ZING!
ReplyDeleteGorgeous pad - you could sell those as custom saddle pads, so unique and gorgeous!
Thanks, Aoife! I could, but who would pay for them? There are custom pad makers out there with some gorgeous products, but their pads range in the $100-200 category. Besides, I'd never have enough time to actually fill orders!
DeleteHaving said that, if you would like one, PM me and we'll see what we can work out.
Wow that is amazing! Quality work and it look gorgeous!!
ReplyDeleteThanks, Karley!
DeleteColor me impressed! That's awesome :)
ReplyDeleteThanks, Dom! I'm pretty happy with how it turned out.
DeleteHoly cow, it's gorgeous! I could never do that!
ReplyDeleteTerry, if you sew at all, it's honestly not that hard if you have some time and patience. For me the hardest part was engineering the whole thing - figuring out the order to sew everything together so that the minimal amount of seams showed. Plus, it's mostly straight lines!
DeleteLooks soooooo good!
ReplyDeleteThanks! I'm planning the next one now... ;)
DeleteNo, Funder. The absolute last thing you need is a new hobby. You may not have a sewing machine.
ReplyDelete(That looks so badass!)
Funder, you TOTALLY NEED a new hobby. And of course you can have a sewing machine. Just think of all the purple bling you could make with it!!!!
DeleteWhat size bias tape maker did you use?
ReplyDeleteI think it's either a 1 inch or 1.5 inch bias tape maker, which means that each half of the tape is 3/4 inch. You want bigger tape to fold around the thick edges.
DeleteWhat is the best way to wash this pad? I recently sewed mine with a felted wool backing (35% wool, 65% rayon) and a 100% cotton top. You can't find any pretty wool pads for English, so I figured I would follow your directions and make one! It is coming out great, but I was just curious as to how to wash it! Thanks!
ReplyDeleteAnon, wow, please send me a link to pics when you're finished!
DeleteFirst off, I used TWO layers of felted wool for each side. That made it a bit more sturdy. Secondly, if you haven't already cut yours out, I recommend washing the fabric in hot water and drying on hot a couple of times. That will help "felt" the wool - pull the fibers tighter and make the whole thing a bit thicker. If you didn't do that already, no worries! It will still turn out fine.
For washing, I just chuck mine in the wash with my other pads. Cold water, regular cycle. I hang all my pads to dry. So far that pad looks almost new, and it's a favorite so it gets used a lot.
Drop me a line directly if you have any other questions... jen jobst at gmail dot com. I can't wait to see yours!
Thanks for posting this (I know I'm a few years late on finding this, but I am still stoked that it's here)! I have been sewing since I was 6, and have recently started riding. It turns out that horses are one of the few things that I am NOT allergic to. My father-in-law also rides and is thrilled to have a riding buddy, and now I know just what to make him for Christmas!
ReplyDeleteWow, if you've been sewing for that long, you've got a huge leg up on me. Please let me know if you've got any question, and send pics when you're finished. I can't wait to see it!
DeleteDo you have to have an "industrial" sewing machine in order to do this because I'm pretty sure my sewing machine isn't that great? It sometimes has trouble going through a layer of thick fabric.
ReplyDeleteNo, I have a pretty standard 10 year old Singer. Mine does have all metal parts on the inside though. It's definitely not industrial but it's also not a $99 machine. You do need to use a heavy duty needle on thick fabrics - that helps a lot!
DeleteAlso, was the saddle pad thick enough just using layers of fabric? Or would you recommend using quilting or foam in the center?
ReplyDeleteI used two layers of felted wool (felted by washing coat-weight wool on hot, then drying it - you can also use two layers of an old thrifted Army blanket, those are great!), plus the upholstery fabric. The pad is now 3 years old looks new. I find that it's plenty thick with just the wool + upholstery fabric, and it breathes really well too! Feel free to email me directly jen jobst at gmail dot com if you have other questions. Good luck, I can't wait to see the finished product!
Delete