I haven't blogged much about the Great Wasp War, but suffice it to say that when we returned from vacation, we had thousands of wasps that had made their nests under our eves. The battle has been long, but we have mostly prevailed - except for a few dozen wasps that persist in hanging out on our front door. Oh well, I suppose it's a great way to keep the Jehovah's Witnesses from coming 'round.
In addition, I have an unfortunate tendency to occasionally find scorpions in our kitchen sink. At least in a contained area they're easy to squish.
And tonight, Herbert the Rat Snake (he's definitely a Herbert and not a Nicodemus - sooo much easier to call him "Herbie" when I'm looking for him) was hanging out behind the feed bins in the back shed while I did night check. At least he kept to himself. However, I did request that he leave a note on the shed door with his whereabouts each evening so that I won't have to inspect the shed for his current location. We'll see how that works out.
Given these critters that we have, I'm wondering how everyone else feels about them. So for entertainment, there's a poll in the right column. But beware: I'm tracking the responses and will happily FedEx you whichever critter you select as your favorite. Trust me, I've got plenty to share. :)

Wednesday, July 28, 2010

Monday, July 26, 2010
How not to electrocute yourself
WARNING: If you are not competent to mess with your house's wiring, DON'T DO IT. Please find a nice, experienced electrician and pay them to do it for you. Trust me, it's not worth your life to mess with electrical stuff if you don't know what you're doing.
Having said that, we're by no means experts, but making wiring "safe" to work on is as simple as finding the breaker for the circuit you're working on and turning it off. Easy as pie. :)
Last weekend, we finally pulled down the overhead wiring run to the shed and the guest house. The plan is eventually to re-run the wiring underground when we build the new barn, which will be where the shed is currently located.
 The problem: Dangling electrical lines supported by a rotted, leaning telephone pole. Definitely something we need to replace, and city code requires that we replace them underground.
 Step 1/2 (not shown): Turn of breaker and test lines thoroughly to make sure you turned off the right one. Step 1: Disconnecting the lines from where attach to the house, under the eves of the hubby's workshop.
 Step 2: Cut and disconnect wires from the shed. Bolt cutters can be helpful when you're cutting thick gauge copper wires.
 Step 3 (also not shown): Pull down telephone pole. Step 4: Coil wires on the ground. Make sure Anie supervises.
The back looks much neater now that we don't have dangling power, telephone, and cable lines. Of course, we don't have electricity to either the shed or the guest house, but we aren't currently doing any work there. Once we have the barn design finalized, we'll be able to dig new trenches so we can run these utilities underground, but until then, we'll use extension cords if we need power in either of those locations.
Saturday, July 24, 2010
Seriously
I don't mind snakes. I rather like them actually.
But when I'm doing night check on all the critters at 10 p.m., I would really, really appreciate it if this particular snake could find a nice, quiet spot that is NOT IN THE SHED WHERE HE SCARED THE TAR OUT OF ME.
 How about hanging out UNDER the shed. Please? At least until after I put everyone to bed.
Because otherwise the neighbors might start to wonder about the screaming.
(And no, I don't know if it's the same snake I saw back in May, but it's also a rat snake and is about the same size, so I would guess that it is. The hubby suggests that if he's a resident, we name him Herbert. I was thinking more along the lines of Nicodemus. Well at least I thought it was clever...)
Wednesday, July 21, 2010
Mid-week kitteh
Because you can only look at so many pictures of drywall, new toilets, or tile being laid, tonight we shall take a break for cute kitties.
Freya has the most adorable habit of sleeping upside-down. Let me demonstrate:
 I wonder if she wakes up with a crick in her neck?
 Note the perfect front-paw curl.
 Sometimes the choice of location leaves a bit to be desired... how exactly am I supposed to close the closet door without disturbing the kitty? (Answer: You don't close the closet door until the kitty moves. DUH.)
 It is also apparently very important to fit yourself to your surroundings.
And for the finale, I give you the coveted streeetch. Try not to pet your screen.
Friday, July 16, 2010
Goodbye, outhouse. Helloooo new bathroom!
Our second bathroom is almost done! The toilet and sink are fully functional, and we just have the trim to install and some touch-up to do. OK, and we have to tile the entire shower, but that's for later. What's absolutely fantastic is that I no longer have to stagger to the other end of the house to use the toilet at 3 a.m. Let me tell you, that's a huge improvement!
I didn't take many pictures of the process because I was elbow-deep in paint and drywall texture for most of the time, but here's a few details. When installing the drain in your sink, always use plumbing putty to ensure a tight seal. (Bonus: plumbing putty is really fun to play with!)
 Epic kludge of plumbing. We had to be creative to get from the sink drain to the pipe coming out of the wall, which is in the lower left corner. However, it drains well and nothing leaks, so I'm not complaining!
 The new dual-flush toilet. It took us quite a bit of adjusting to get the two flushes right, but it's pretty spiffy!
 The vanity, installed, which is a minor miracle. The assembly instructions were ATROCIOUS, so we sort of made it up as we went along. We ended up with a handful of parts when we were done, which is a little... disconcerting. However, it seems to work just fine.
 And the final touch, the mirrored medicine cabinet. We still have to install the chair rail (it'll go where the white line is in the picture), baseboards, and trim around the door and window, plus touch up the ceiling. Oh, and hang towel racks and such. But still, we're very close to being 100% done.
OK, 100% done except for the shower. But I'm ignoring that for now, because I have a functional toilet just steps from our bedroom. How civilized!
Wednesday, July 14, 2010
Dangerous to horses: Silverleaf Nightshade
I am currently waging a war on a rather noxious weed common in central Texas called Silverleaf Nightshade.
 It's a woody, herbaceous plant that grows about 2 feet tall, has purple flowers and spiny bits around the base of it's stem, and is toxic to sheep and cattle, and in an odd, roundabout way, horses.
 These little seed pods, which turn yellow-orange when ripe, are of particular concern.
Fortunately, the boys don't eat it, but I don't want to chance them getting one of the seed pods by accident. Several years ago I boarded at a barn that got a load of hay that had nightshade in it; about that time a horse on the property died a rather horrible death. The autopsy was inconclusive, but I've always suspected the two were related.
Anywho, I have been diligently pulling the little (ok, big) buggers out of the back pasture, maybe 5 minutes per day for the last few days. They're apparently really hard to kill because they spread by their underground root system, which is extensive and deep. However, if I can prevent the seeds from spreading, and pull the big ones out of the ground consistently enough, I'll eventually get them under control. I hope.
 It's a woody, herbaceous plant that grows about 2 feet tall, has purple flowers and spiny bits around the base of it's stem, and is toxic to sheep and cattle, and in an odd, roundabout way, horses.
 These little seed pods, which turn yellow-orange when ripe, are of particular concern.
Interestingly, horses that eat the plant don't show adverse effects, although sheep and cattle do. The reaction occurs when a horse that's been eating the plant is wormed with Ivermectin - apparently the combination of the two develop a neurotoxin, and drooling, head pressing, and even death can occur. Eeek!
Fortunately, the boys don't eat it, but I don't want to chance them getting one of the seed pods by accident. Several years ago I boarded at a barn that got a load of hay that had nightshade in it; about that time a horse on the property died a rather horrible death. The autopsy was inconclusive, but I've always suspected the two were related.
Anywho, I have been diligently pulling the little (ok, big) buggers out of the back pasture, maybe 5 minutes per day for the last few days. They're apparently really hard to kill because they spread by their underground root system, which is extensive and deep. However, if I can prevent the seeds from spreading, and pull the big ones out of the ground consistently enough, I'll eventually get them under control. I hope.
Tuesday, July 13, 2010
Woohoo! I managed to single-handedly fix the shed!
Tonight I managed to fix the shed. More or less.
On the way home from work, I stopped at Lowe's to pick up a 2-ton floor jack. Using a jack was the only way I could figure to prop the shed roof enough to screw it back together. I rounded up a few 6 foot-ish 2x4s, some screws and the drill, and headed out back.
 First, I propped up the edge of the roof with the jack and a 2x4. This was actually a fairly bad idea, because it was the only support the roof had once I jacked it off the panel that was supporting it. However, I tried to be as careful as possible and spent the least amount of time under the roof as I could, in case it fell.
 Next, I propped a second support beam under the roof next to the middle post, since I decided it would be safest to screw the middle post back together first.
 Here's the middle support beam after I've pried two of the three old nails out of the header (I couldn't get the last one out, but it wasn't in the way).
 And here it is after I've screwed it together. I had a hard time pulling the beam and the post together to get the screws to bite while drilling at the same time, so there's more of a gap between the post and the beam than I'd like, but it's on there pretty solidly.
 Next, I fixed the end post. The major problem here was that the post had moved to the right several inches and was no longer directly under the roof. In addition, the panel that was holding up the roof when it fell was actually preventing me from pushing the post back into place. So, I had to take the panels apart and rearrange them.
 Here you can see just how far the post had moved from the beam. And bonus, nasty rusty nails!
 After moving the jack support to just beside the corner post and getting the panel out of the way, I was able to push the post back into place under the beam.
 Once the post was under the beam and I had screwed it all back together, I removed the support and volia! More or less repaired shed.
 All done. Boys are back to snacking happily on their round bale, and the roof is more or less level. Let's just hope it stays together until we get the new barn built!
On the way home from work, I stopped at Lowe's to pick up a 2-ton floor jack. Using a jack was the only way I could figure to prop the shed roof enough to screw it back together. I rounded up a few 6 foot-ish 2x4s, some screws and the drill, and headed out back.
 First, I propped up the edge of the roof with the jack and a 2x4. This was actually a fairly bad idea, because it was the only support the roof had once I jacked it off the panel that was supporting it. However, I tried to be as careful as possible and spent the least amount of time under the roof as I could, in case it fell.
 Next, I propped a second support beam under the roof next to the middle post, since I decided it would be safest to screw the middle post back together first.
 Here's the middle support beam after I've pried two of the three old nails out of the header (I couldn't get the last one out, but it wasn't in the way).
 And here it is after I've screwed it together. I had a hard time pulling the beam and the post together to get the screws to bite while drilling at the same time, so there's more of a gap between the post and the beam than I'd like, but it's on there pretty solidly.
 Next, I fixed the end post. The major problem here was that the post had moved to the right several inches and was no longer directly under the roof. In addition, the panel that was holding up the roof when it fell was actually preventing me from pushing the post back into place. So, I had to take the panels apart and rearrange them.
 Here you can see just how far the post had moved from the beam. And bonus, nasty rusty nails!
 After moving the jack support to just beside the corner post and getting the panel out of the way, I was able to push the post back into place under the beam.
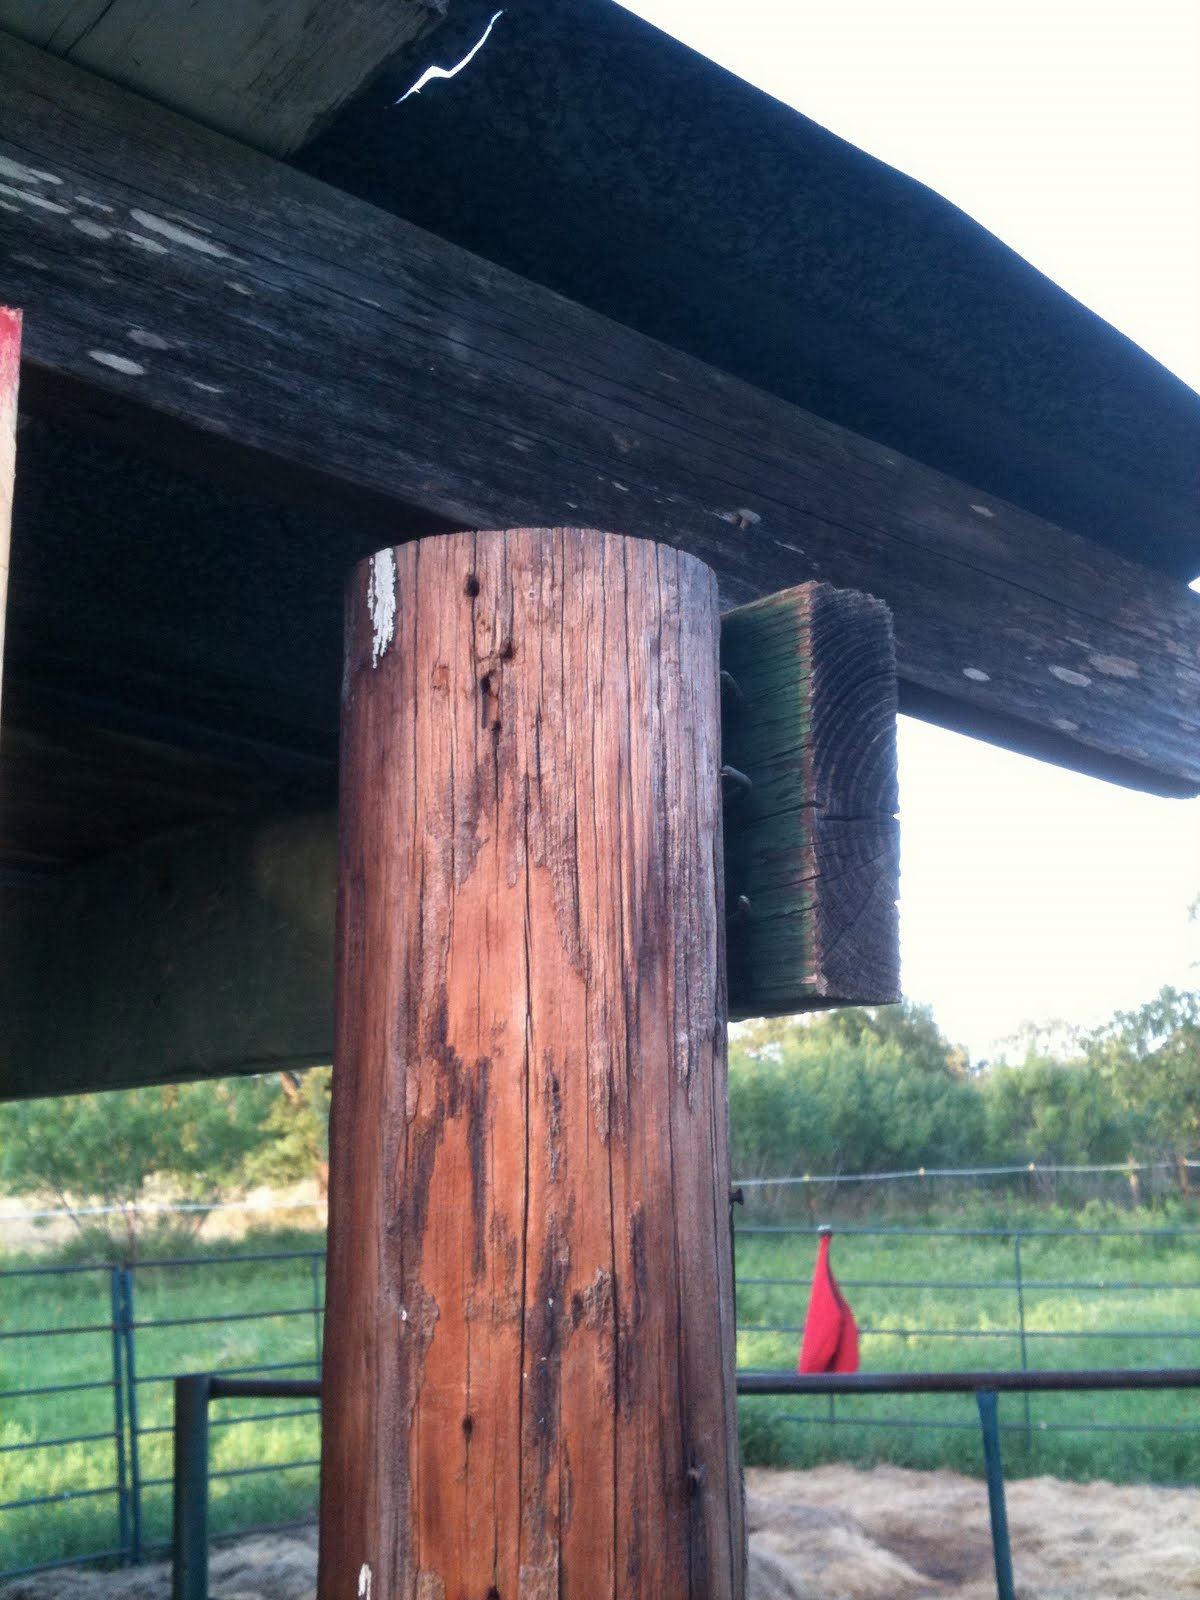 Once the post was under the beam and I had screwed it all back together, I removed the support and volia! More or less repaired shed.
 All done. Boys are back to snacking happily on their round bale, and the roof is more or less level. Let's just hope it stays together until we get the new barn built!
Subscribe to:
Posts (Atom)