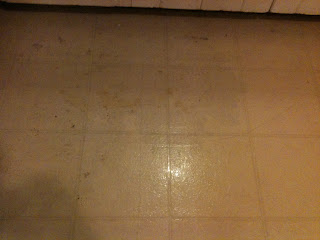
I've been trying to live with the kitchen, but a couple of weeks ago, I decided I absolutely could not live with floor anymore. It's white linoleum, covering a couple of layers of paint, covering the original oak floor. Eventually we'll refinish the wood, but again, not until we do the addition. Even so, I couldn't take the linoleum any more.
I know, you're thinking, "how bad can the floor be?" Let me 'splain:
It used to be white, but now it has spots and all sorts of random stains that do not come off when cleaned. Gross.
The kitchen originally had a half-wall in the middle of it, and they pulled out the wall after they put in the linoleum. That left a big hole in the linoleum. Great place for dirt to get trapped.
Here's a close-up of the hole. Don't you want something like this in the middle of your kitchen?
As an extra added bonus, the linoleum was peeling up around the edges, especially around the door.
We went through a couple of options for the flooring. The linoleum is really easy to peel up, which will be great when we get around to refinishing the floor. We wanted something that would look better than more linoleum, that would go on quickly, but was fairly cheap. After getting advice from a couple of folks (thanks Funder), we settled on a vinyl stick-down tile that was groutable. At $0.99/sq foot, the price was right too!
To prep the floor, we filled the hole with a spare block of wood and leveled it out as best as we could.
We peeled up the loose linoleum back to where it was well-stuck to the floor so that we'd have a more solid base to work on.
You can get an idea of the layers of goo that are on the floor under the linoleum. We definitely have our work cut out for us when we refinish the floor!
And then... we stuck down the first tile!
We kept sticking down whole tiles, using 3/16 tile spacers to make sure we laid them evenly. Freya supervised.
Here's the floor with all of the whole tiles. The little dots on the corners are the spacers.
After all the tile was laid, we grouted.
And here's what it looks like done!
While I was at it, I repainted the kitchen from a sickly greenish-offwhite to a bright blue.
I think it goes pretty well with the awful yellow tile countertops... definitely provides a good contrast!
It's not the best remodel ever, but it's a whole lot better than it used to be! I think we can live with it for another few years without being hugely embarrassed by our kitchen. :)
It took the hubby and I three hours on Friday night, then another few hours Saturday morning, to cut, lay, and grout the majority of the tile. It took me another solid day (by myself, hubby was gone) to finish cutting and laying the remaining tile, grout it, cut and install quarter-round molding, and paint. Not bad for a weekend project, and the entire thing cost us less than $300!
The only thing left to do is make some curtains for the kitchen window. I want to go with a fabric that has both blue and yellow in it, so it's either this one (kinda busy, but maybe cute for a country kitchen?)
Or this one... just because I can! What do you think?


Nice job on the floor! Sometimes a little upgrade is worth it when the actual remodel is a few years out. It turned out really pretty, and the blue is beautiful! I like the first fabric for classy curtains, but I'm not sure you can go wrong with John Deere! LOL
ReplyDeleteThanks! I'm really glad we did it. I'm not grossed out by my kitchen anymore.
DeleteNow the question is whether to repaint the cabinets now or wait...
Very cute! I really like the blue. I vote for the first fabric - I quite like the pattern and think it would look smashing with the walls.
ReplyDeleteI like first fabric also--very pretty!
ReplyDeleteY'all aren't going to give me an excuse to go with the John Deere, are you? Darnit... ;)
ReplyDeleteThat looks OMG so much better! I like the blue a lot. It looks like a whole new kitchen, very cheerful. Isn't it just amazing to have a sweepable moppable floor?!
ReplyDeleteFunder, it FEELS like a whole new kitchen! And yes, the sweepable moppable floor that doesn't look like crap AFTER you sweep and mop is nice too!
Deletehahahaha I stepped on that hole so many times!! And then thought, "...oh... gross." I'm diggin the new blue paint, too.
ReplyDeleteI LOVE THAT KIND OF TILE! We redid the tile in my parent's house and used that kind. So easy, so nice!
And sorry about the John Deere, but no... please. That looks like something one of the little old women at the quilt clubs I go to (yes, I go to quilt clubs, let's get it out there) would use to make a quilt for their grandson... who she always forgets is 13 and not 3. Pink bunny suit from A Christmas Story, anyone?
But you know what the nice thing about having your own house is? It's your house. So you use the John Deere fabric for the curtains, girl!
I may do John Deere just for when family comes. To scare them, you know. ;) I will also be sure to make quilts for everyone.
DeleteJust 'cause I can.
PS. You sew? COOL! We should get together sometime!
Your kitchen looks great with the tile and I love the blue color you picked out for the walls. Really nice!
ReplyDeleteThanks! I was worried the blue would be too much but it seems to be the right color.
Delete